Step by step: create a new product, set price, description and stock, and publish it.
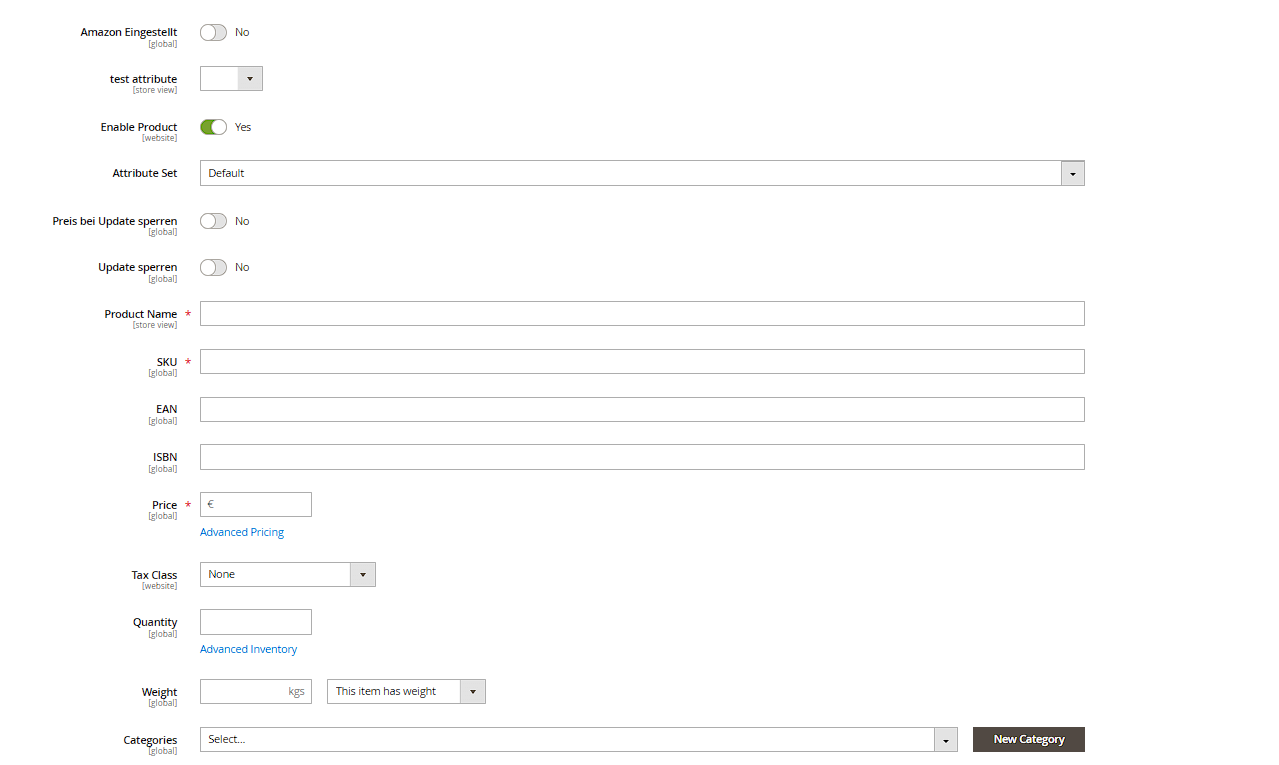
Start a new product under Catalog > Products > Add Product. The form is organized into several sections/tabs that can vary depending on the attribute set. The most important fields in the header area:
- Product Name and SKU (an internal, unique item number – auto-derived from the name, but you can override it; the SKU should never be changed later, since it's historically referenced in orders).
- Price and, if needed, Special Price with a start/end date for time-limited promotional pricing.
- Quantity and Stock Status – how many units are available and whether the product can be ordered at all, even if stock exists.
- Categories – which category (or categories) the product belongs to; a product can belong to several categories at once.
- Description and Short Description – the long description shows on the product page, the short one appears in product listings and sometimes in search result snippets.

Other tabs on the form
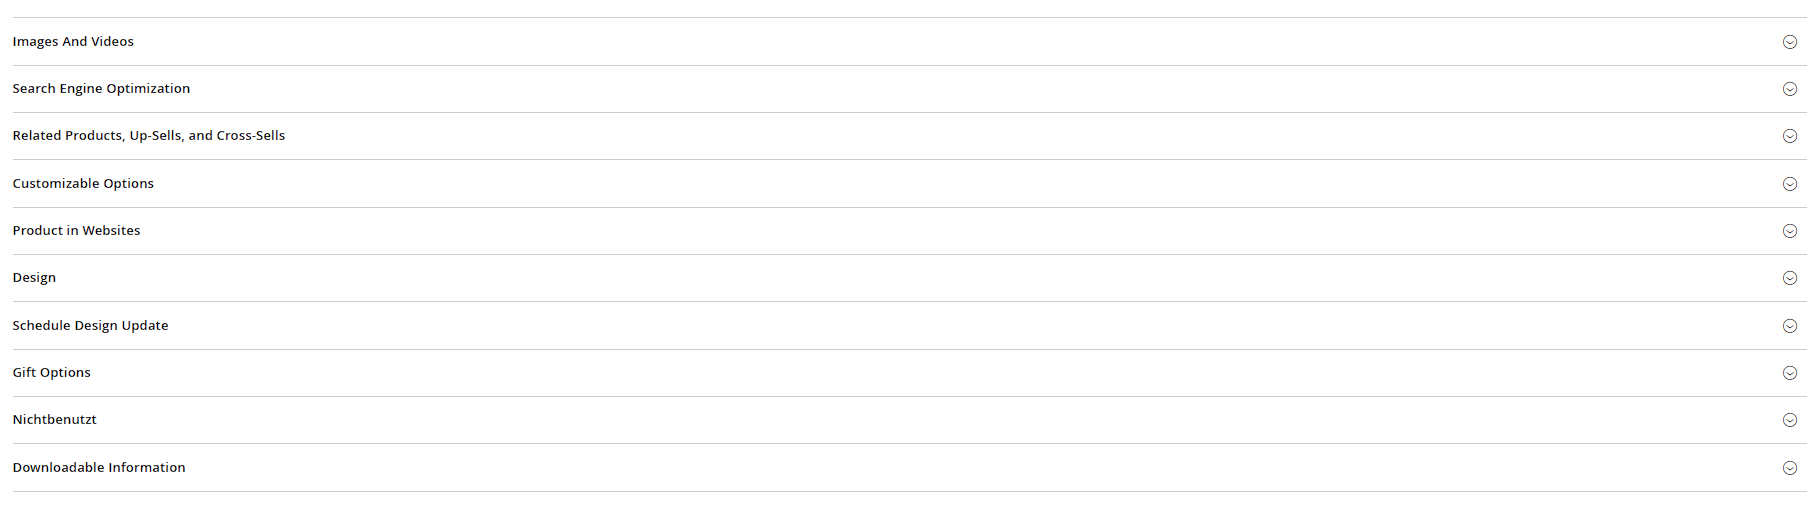
- Images and Videos: product images (see its own chapter).
- Search Engine Optimization: URL key, meta title, meta keywords, meta description.
- Related Products, Up-Sells, Cross-Sells: manual product links for "you might also like" recommendations.
- Customizable Options: extra options the customer can pick, with an optional surcharge (e.g. engraving, gift wrap).
- Product in Websites: for multi-website setups, which websites the product is assigned to.
Visibility and status
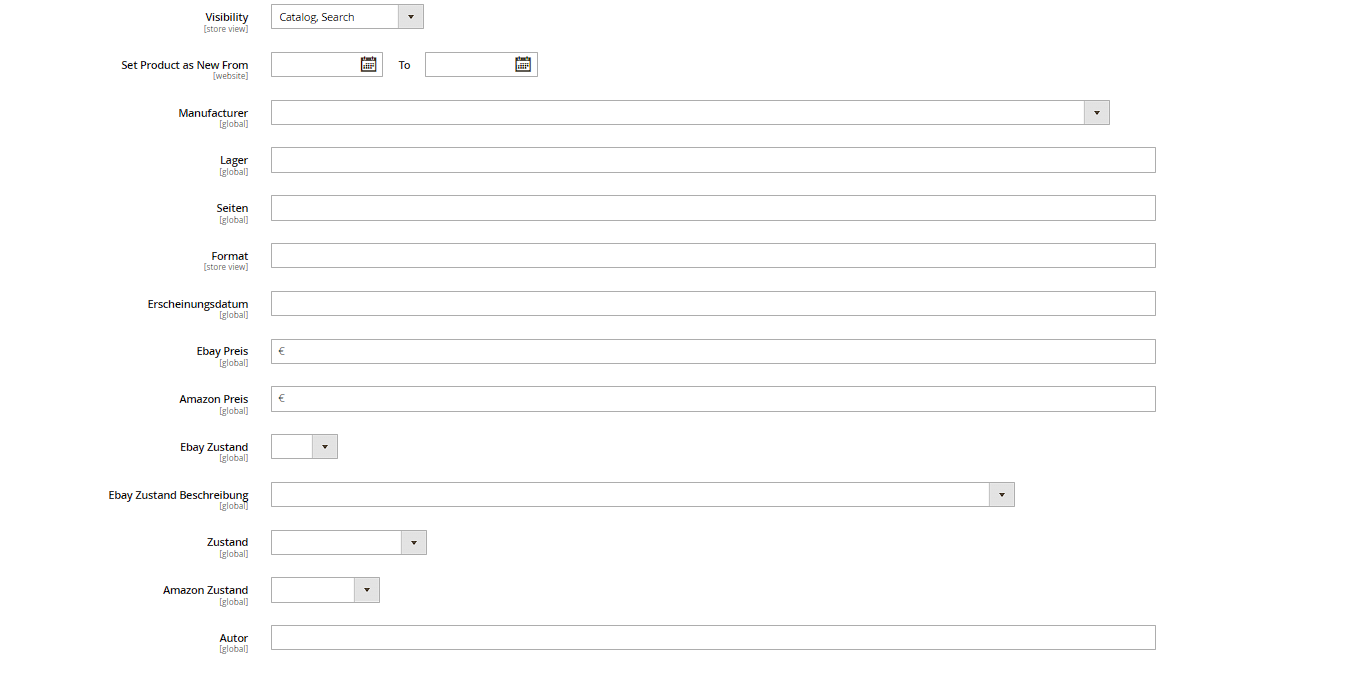
In the top right you set Enable Product and Visibility (Catalog, Search, both, or "Not Visible Individually"). The latter is typically used for variants that should only be reachable through their configurable parent product, not individually in the catalog or search.
Saving and appearing in the store
Finally, save with Save (or Save & New/Save & Close via the dropdown arrow next to it). Depending on your indexer configuration (see the "Understanding Indexers" chapter), the product appears in the store immediately or only after the next scheduled reindex run.
Practical tip: when adding many similar products, first create a "template product" with every field correctly filled in, then use Copy (button top right of the product form) to quickly create duplicates with the same base settings.
Advanced pricing
The Advanced Pricing link right next to the Price field opens a dialog with additional pricing fields: Cost (your internal purchase cost, never shown to the customer, but used in profit reports in the backend) and Tier Price (quantity-based pricing: from which order quantity a given customer group gets which reduced price or percentage discount). Depending on configuration, Minimum Advertised Price (MAP) may also appear here, letting you show the regular price only in the cart instead of already on the product page.
Weight and tax class
The Weight and Tax Class fields sit in the upper form area next to Price and Quantity. Weight feeds into shipping cost calculation (e.g. for weight-based shipping methods) and is automatically hidden for virtual and downloadable products. Tax Class determines which tax rule is applied to the product at checkout – the default is usually "Taxable Goods".
Marking a product as new
The Set Product as New From and Set Product as New To fields define a date range during which the product counts as "new" – e.g. for a "New Arrivals" widget on the homepage or a NEW badge in the theme. Without an end date set, the marking stays active indefinitely.
Design tab: custom layout
The Design tab lets you choose a different Layout per product (e.g. a version without a sidebar), and advanced users can add product-specific layout tweaks via Layout Update XML without building a dedicated layout module for it. This option is aimed at technically experienced users and should be used sparingly.
