Managing Newsletters
Manage newsletter sign-ups, export subscribers, and configure the basic sending settings.
You'll find newsletter subscribers under Marketing > Newsletter Subscribers. The list shows status (Subscribed/Unsubscribed/Unconfirmed/Not Active) and sign-up date for each contact – exportable as CSV, e.g. for an external email marketing tool. The Delete bulk action lets you remove multiple entries at once, e.g. after a GDPR deletion request.
Basic settings
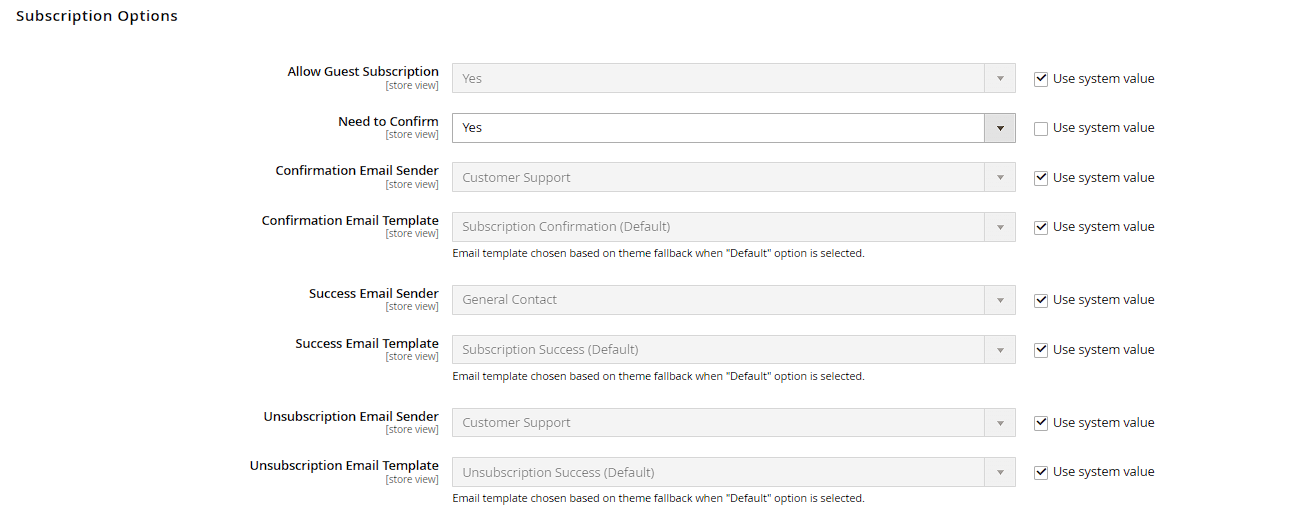
Under Stores > Configuration > Customers > Newsletter you can configure, among other things:
- Allow Guest Subscription: whether guests without a customer account can subscribe too.
- Need to Confirm: enable double opt-in – practically mandatory under EU law (a confirmation email with a confirmation link after sign-up, before the contact actually counts as "Subscribed").
- Success Email Sender/Template and Unsubscribe Email Sender/Template: which emails get sent after a successful sign-up or unsubscribe.
Limits of the native feature
Magento itself mainly offers subscription management, not a full-fledged newsletter editor or convenient campaign sending. The native feature under Marketing > Newsletter Templates (creating templates) and Newsletter Queue (scheduling sends) exists functionally but is very basic – no drag-and-drop editor, no A/B testing, no automated trigger campaigns (e.g. cart abandonment reminders).
In practice
For professional campaigns the subscriber list is therefore usually exported to, or continuously synced via API with, a specialized tool such as Klaviyo, Mailchimp or Brevo – these tools bring their own editors, automations and analytics that go far beyond Magento's built-in capabilities.
Creating a newsletter template
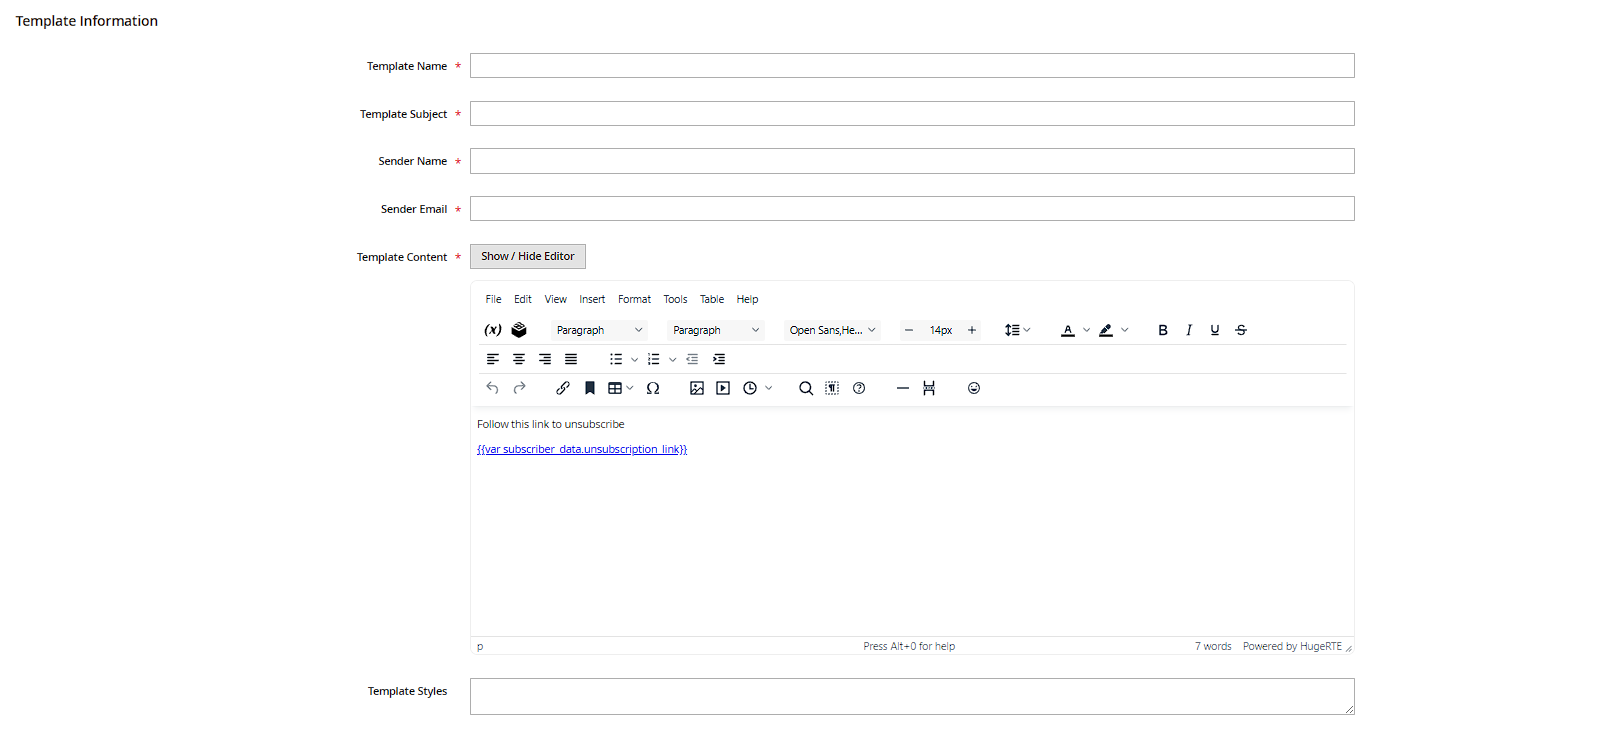
Under Marketing > Newsletter Templates > Add New Template you create a template: Template Name (internal label), Template Subject (subject line), Sender Name/Sender Email (sender identity), and Template Content for the actual HTML content, where you can use Magento variables such as {{customer.email}}. Use Preview Template to check the result before sending.
Scheduling delivery via the newsletter queue
A finished template is moved into a send queue (Marketing > Newsletter Queue) via the Queue Newsletter button, where you set the Start Time and the relevant Stores. Actual sending, however, doesn't happen instantly – it runs through the newsletter_send_all cron job. If cron isn't running regularly, a scheduled queue stays stuck at status "Not Sent" even after its start time has passed.
Configuring the sender identity
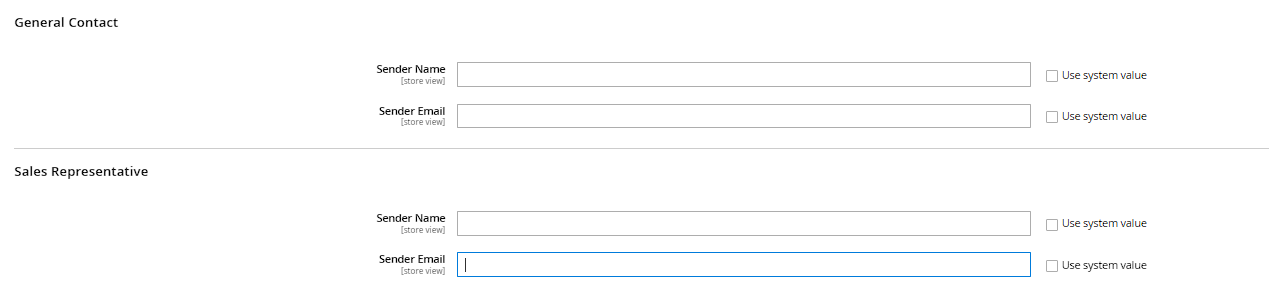
The sender identities selectable in newsletter templates come from Stores > Configuration > General > Store Email Addresses (fields such as Sender Name/Sender Email for "General Contact", "Sales Representative", etc.) – the same configuration area also used for order confirmations and other system emails. A credible, dedicated sender address with properly configured SPF/DKIM reduces the risk of landing in the spam folder.
Error analysis: Newsletter Problems Report
Under Reports > Newsletter > Newsletter Problems Reports, Magento lists failed deliveries along with the email address and error message for each send attempt. This helps you identify permanently undeliverable addresses (bounces) and remove them from the subscriber list if needed, instead of producing the same error on every send.